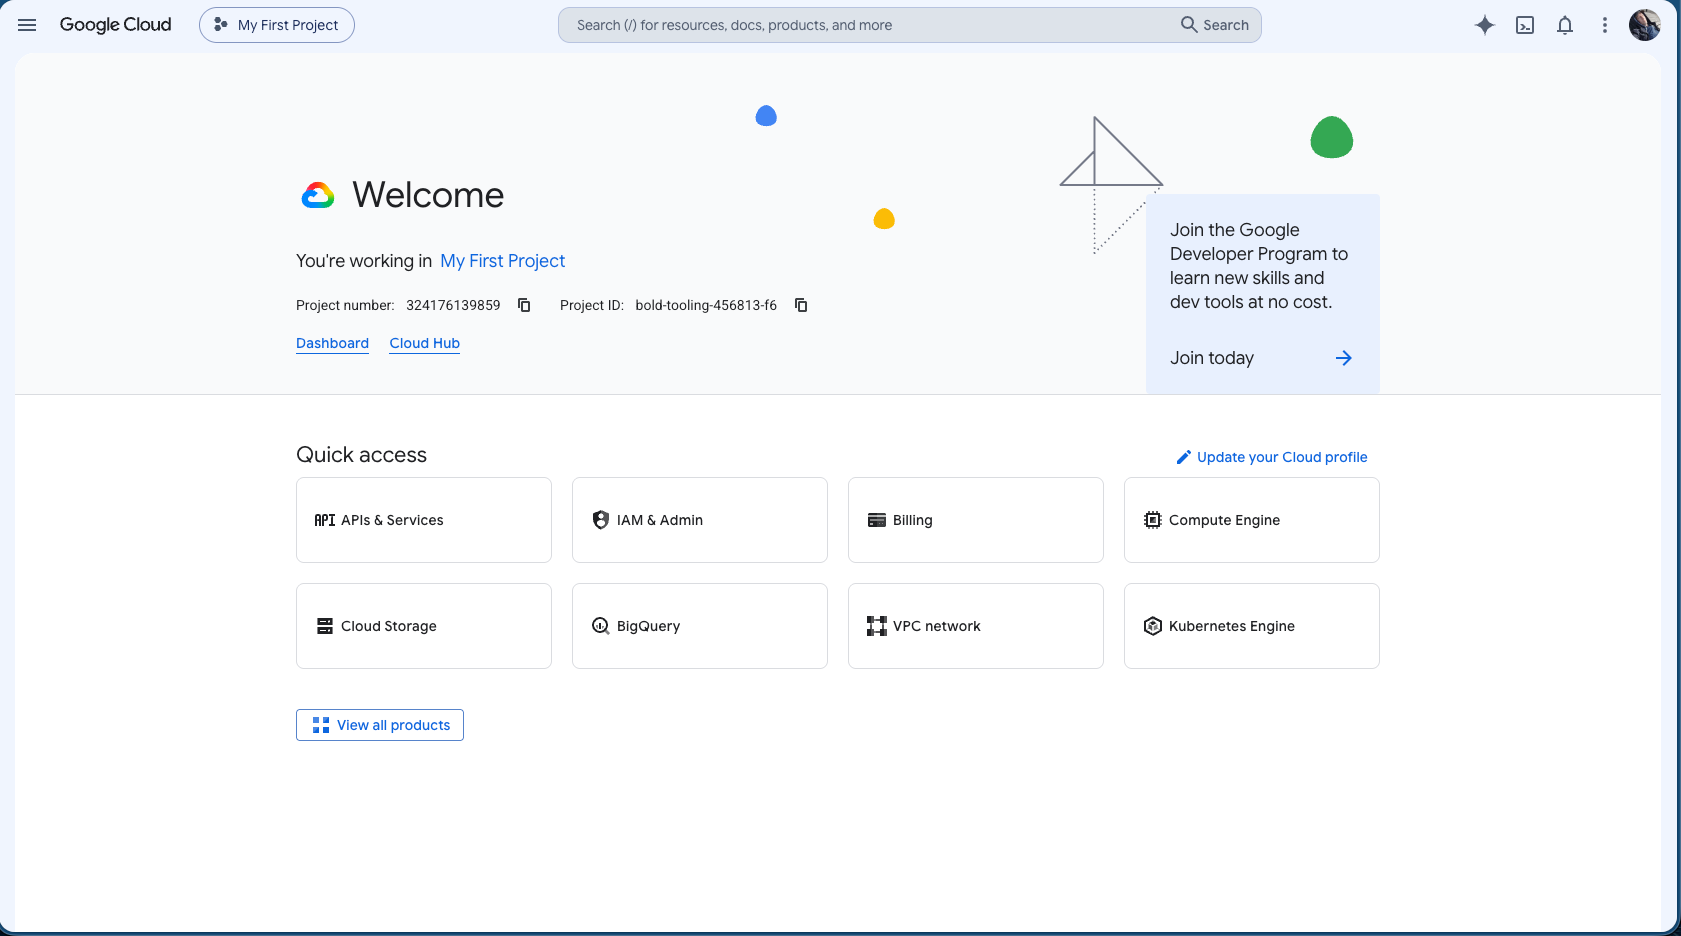
Open Google Cloud Console
Open Google Cloud Console and sign in with the Google account that should own the setup.

Google API setup (optional upgrade)
A practical step-by-step guide to create the project, enable the right APIs, copy the key, and paste it into Waybound Studio.
The free tier needs no Google key at all — it runs automatically on OpenRouteService, Trafikverket and Open Places. This guide is for anyone who wants to upgrade to Google's map, geocoding and place data instead.
With your own key, Waybound Studio uses Google Maps Platform for route calculations and place data. This guide documents the current version of Waybound Studio, so it enables Directions API, Distance Matrix API, Geocoding API, and Places API.
When the app later migrates to Google's newer Routes API, the documentation will be updated with a separate migration guide.
Google Cloud menus change often. This guide uses direct links so users do not have to search through the interface.
Open Google Cloud Console and sign in with the Google account that should own the setup.
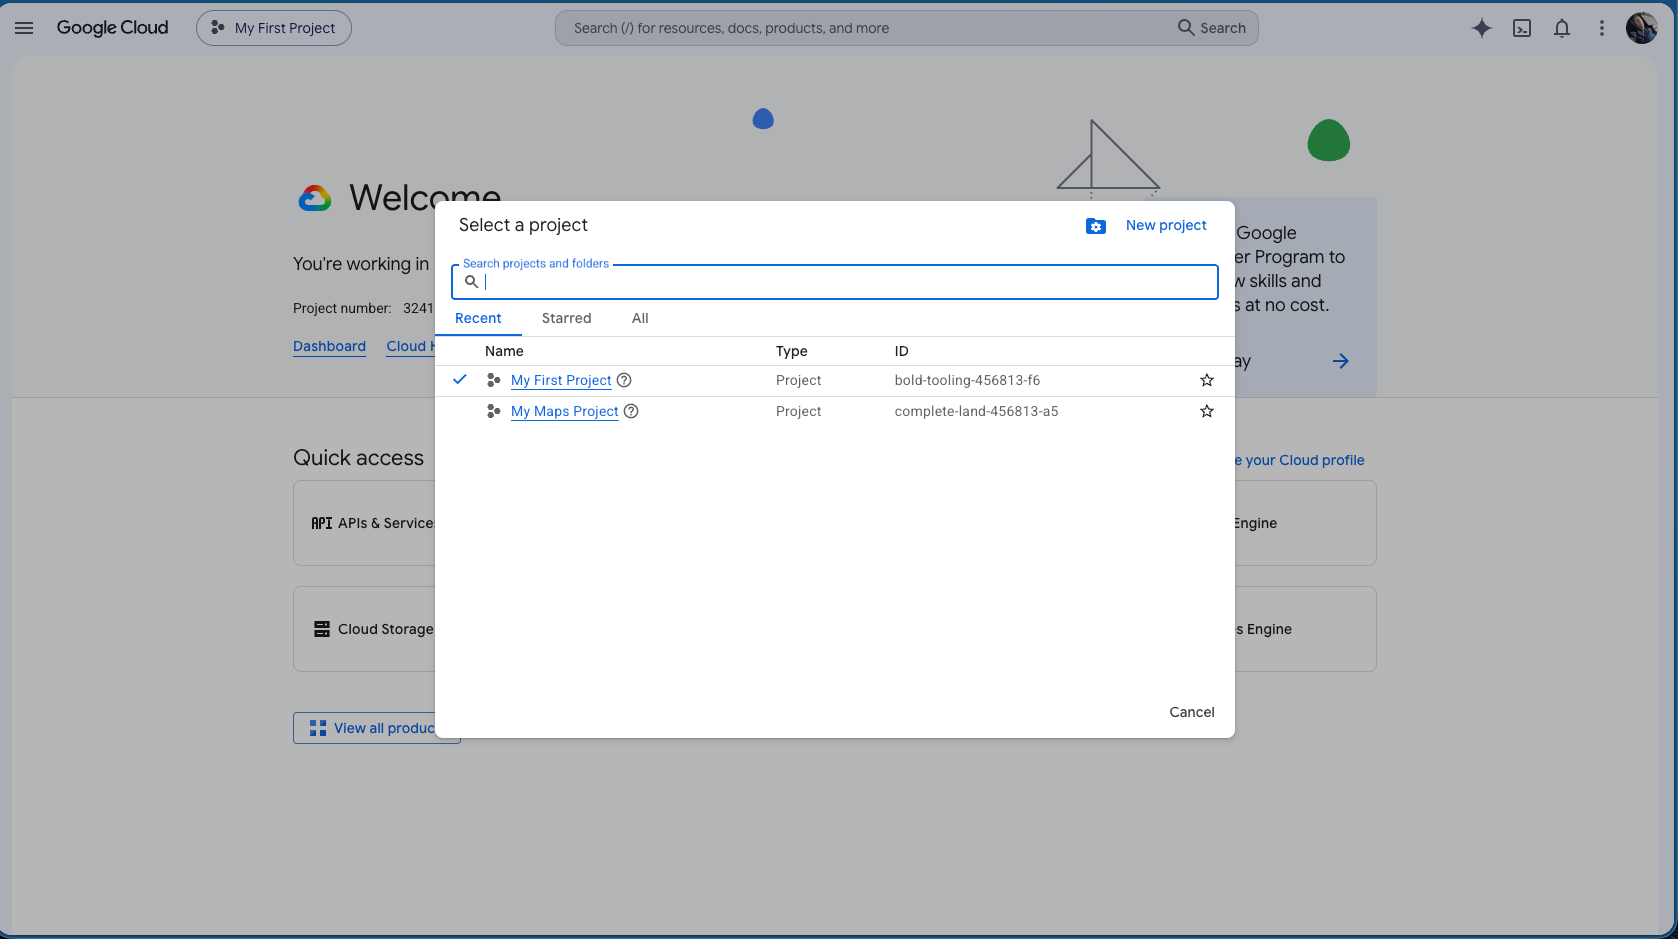
Click the project button in the top-left corner, for example My First Project. Then click New project.
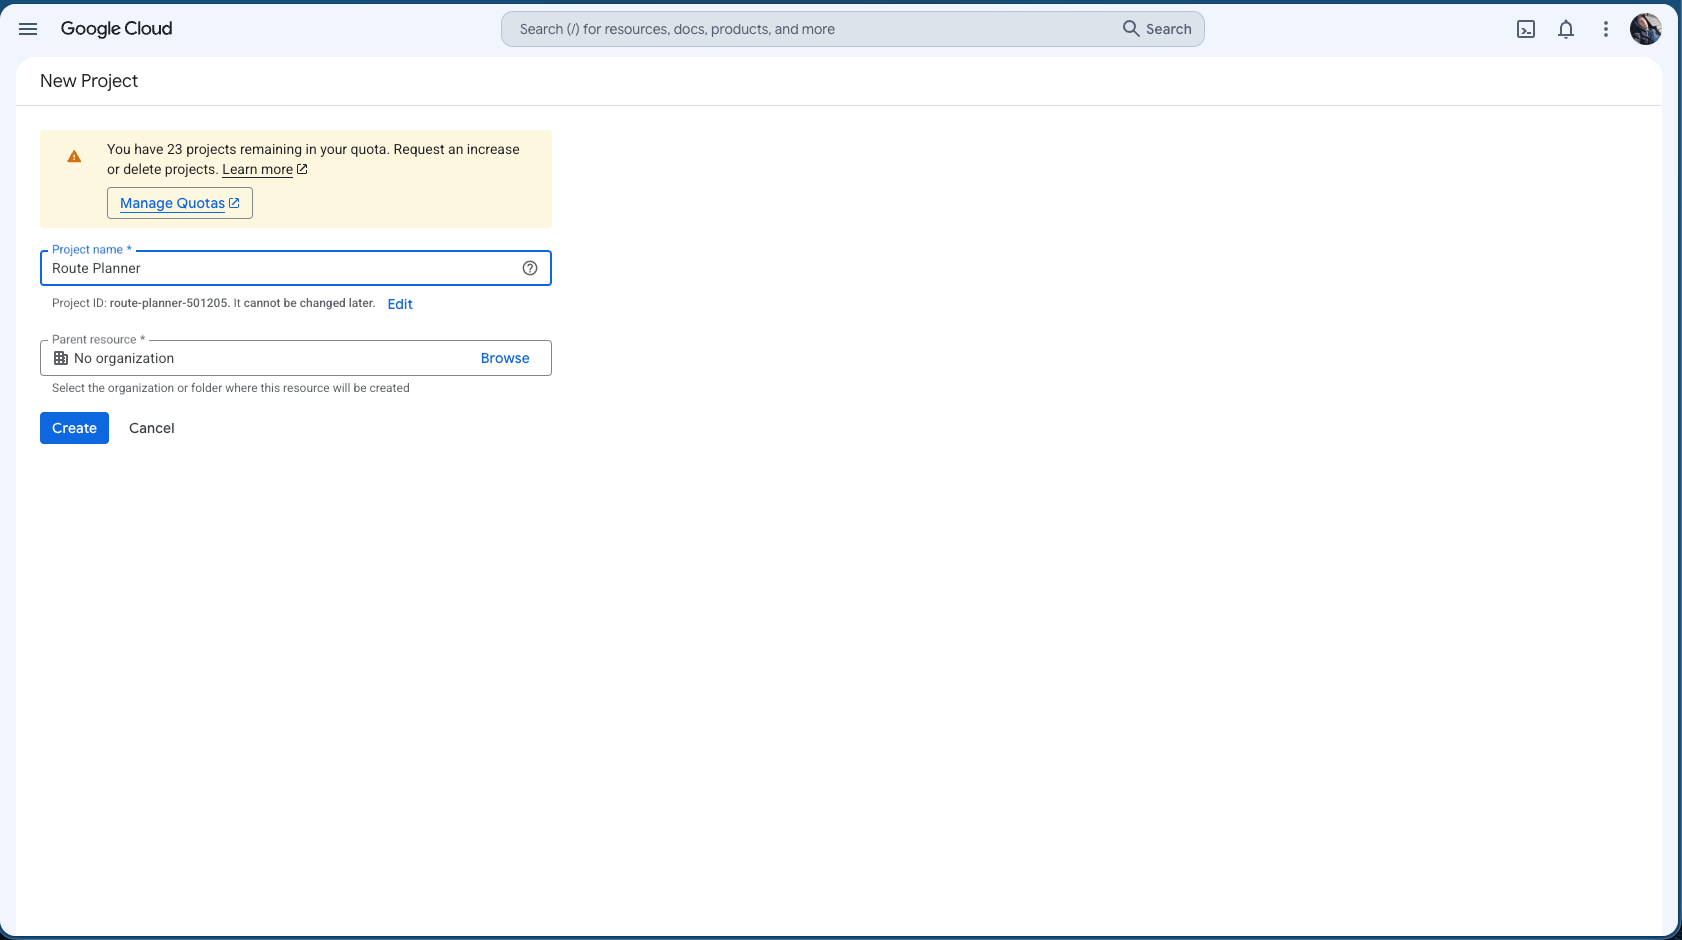
Use Route Planner as the project name and click Create.
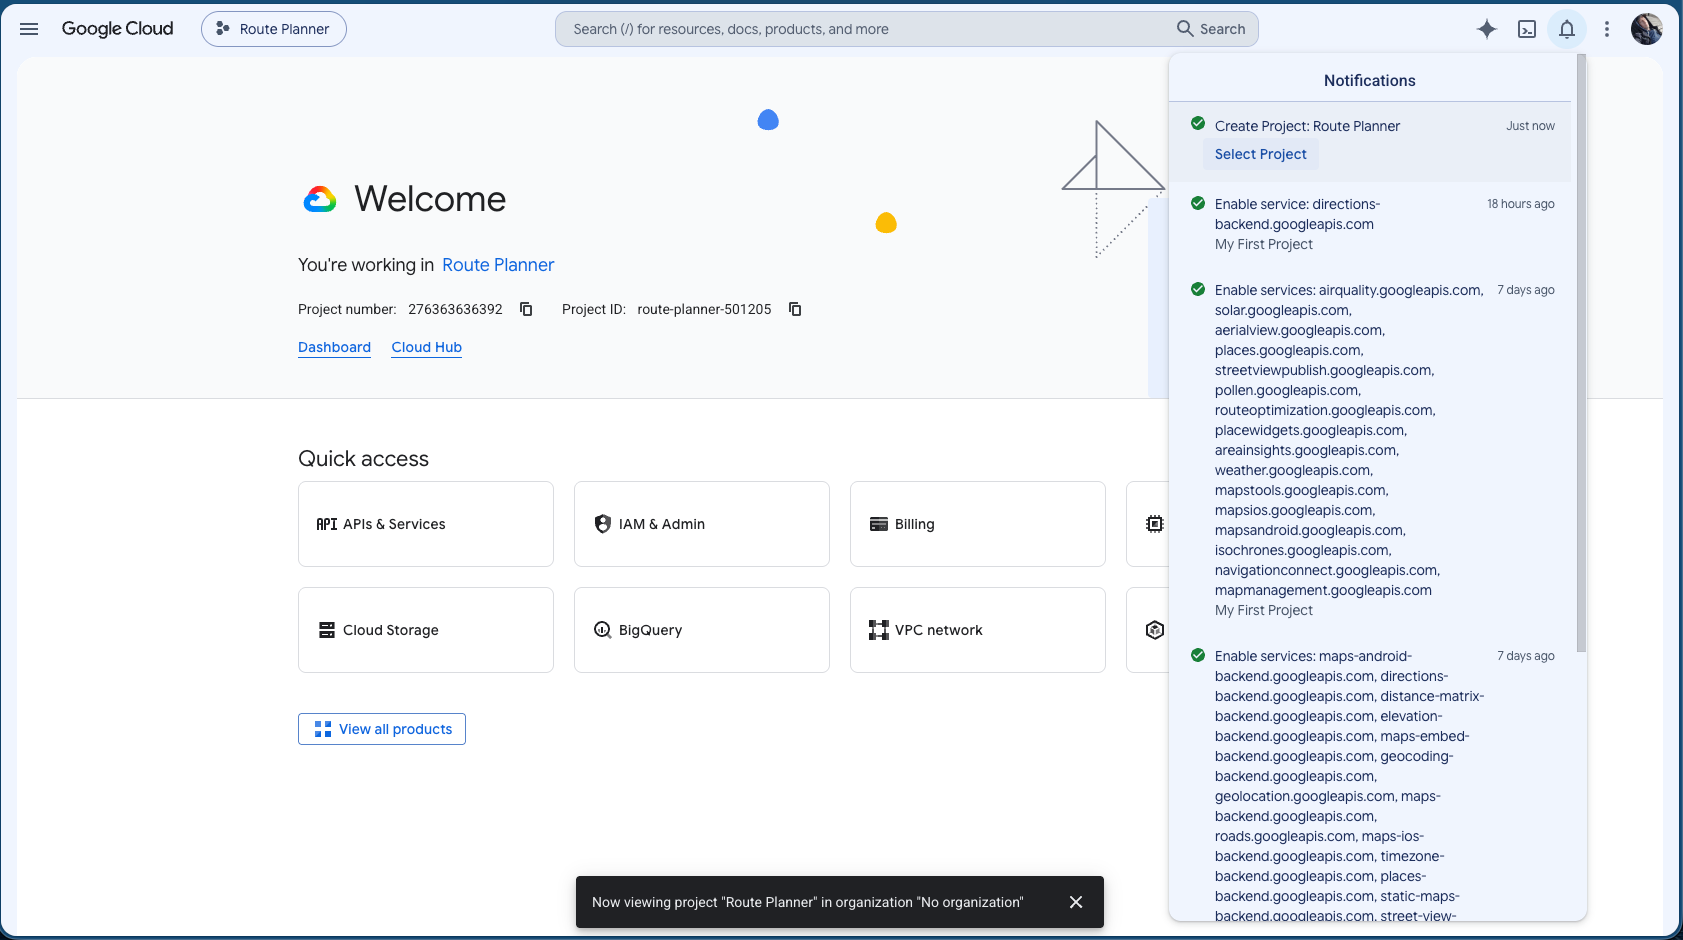
When the project is ready, Google shows a notification. Click Select Project so Google Cloud works inside the Route Planner project.
The full process is shown once with Directions API. Repeat the same steps for the remaining three APIs.
Open API Library using the direct link below. Confirm that Route Planner is selected in the top-left corner.
Open API Libraryhttps://console.cloud.google.com/apis/library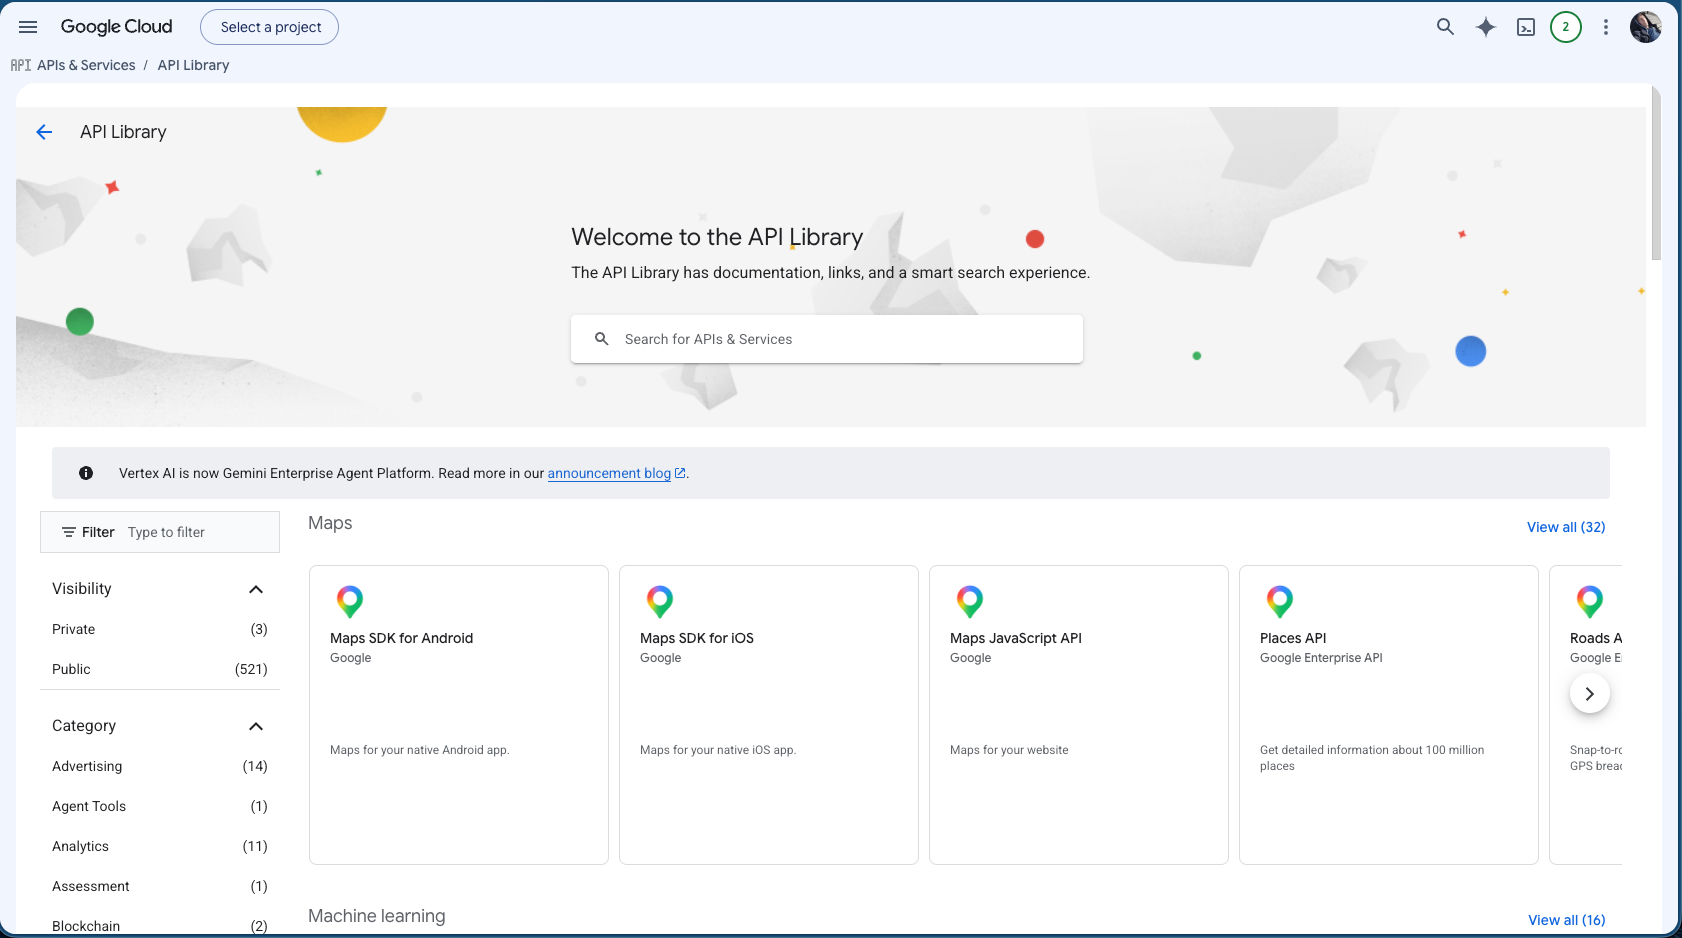
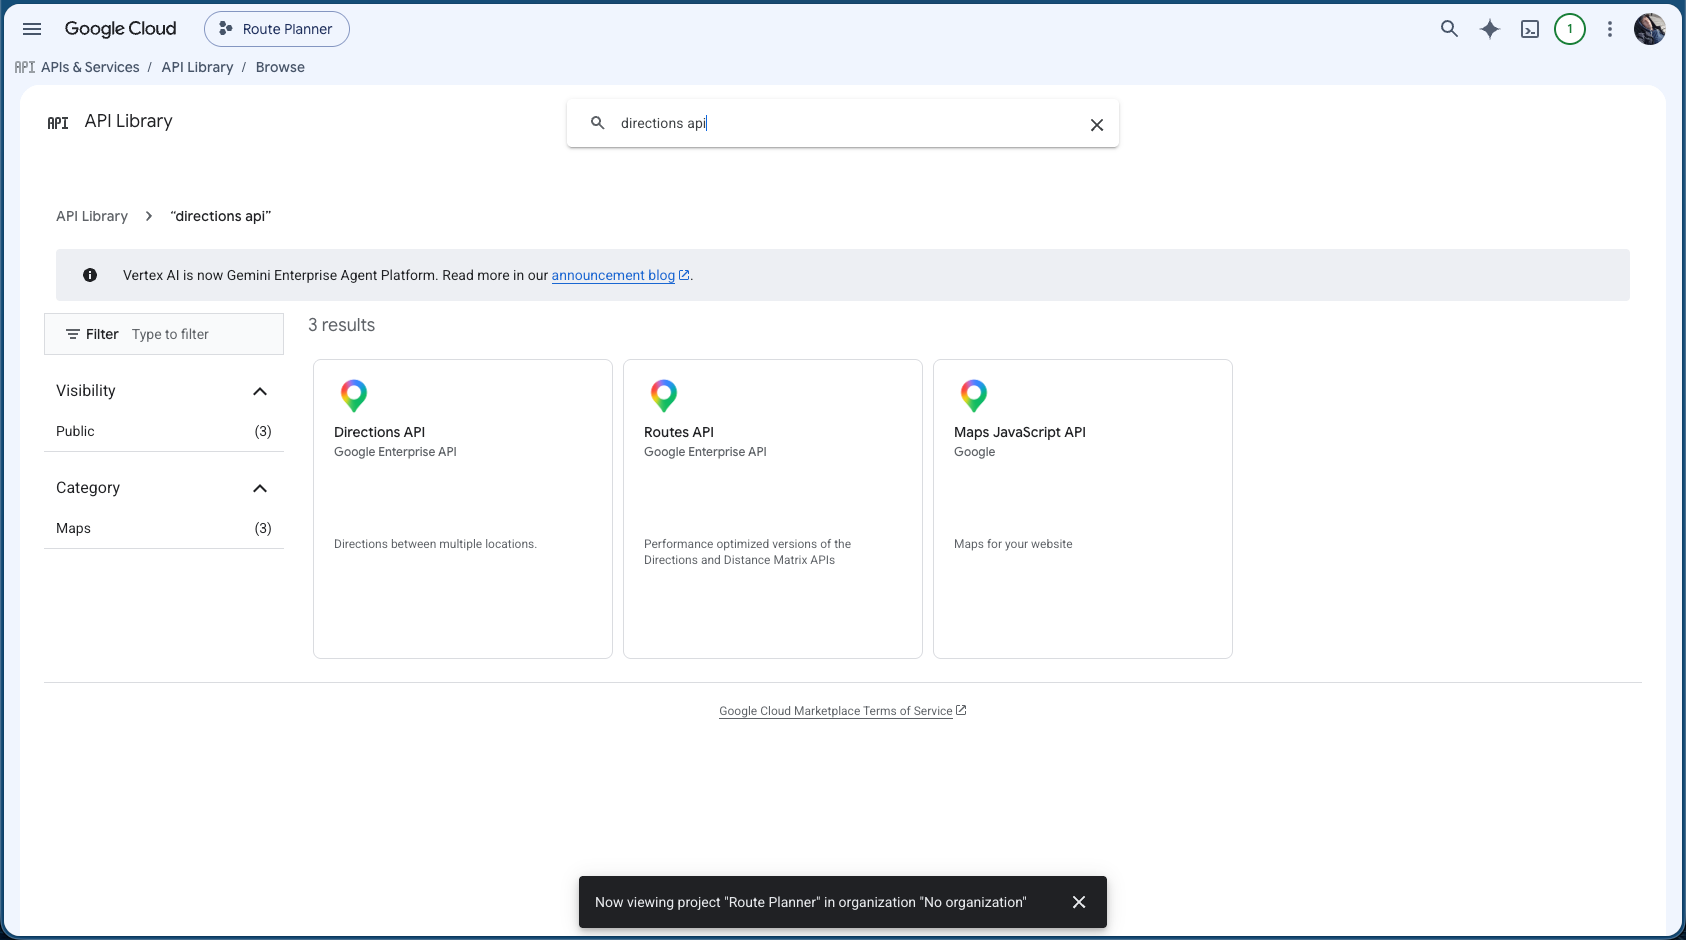
Type Directions API in the search field and click the Directions API result.
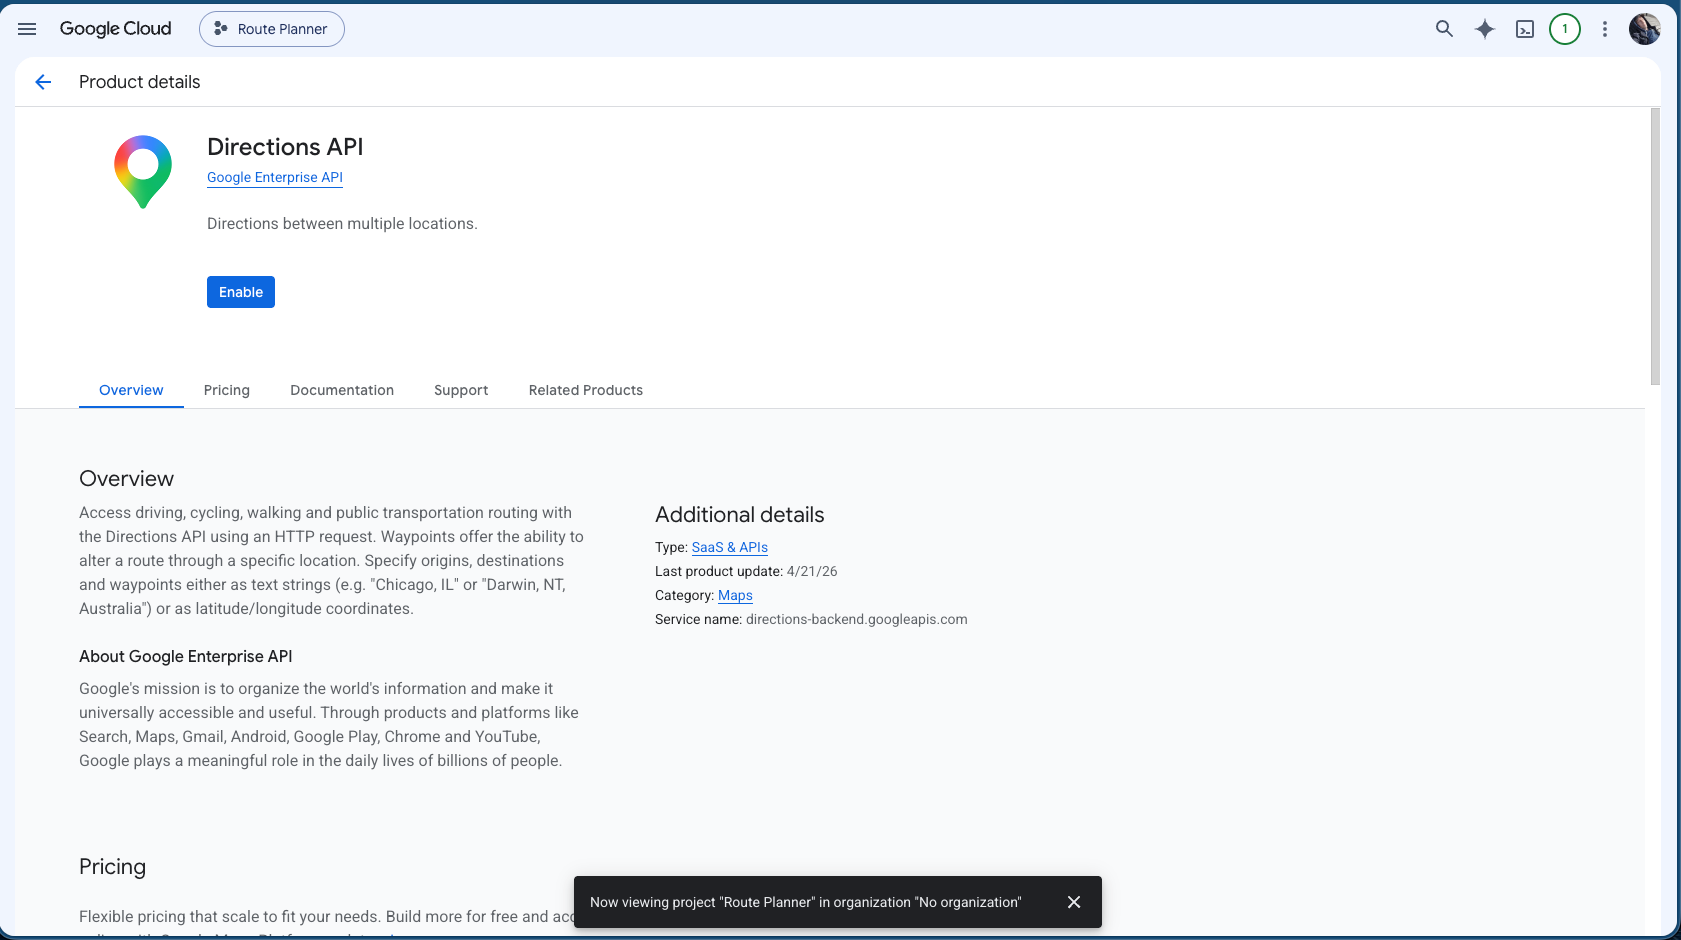
Click Enable.
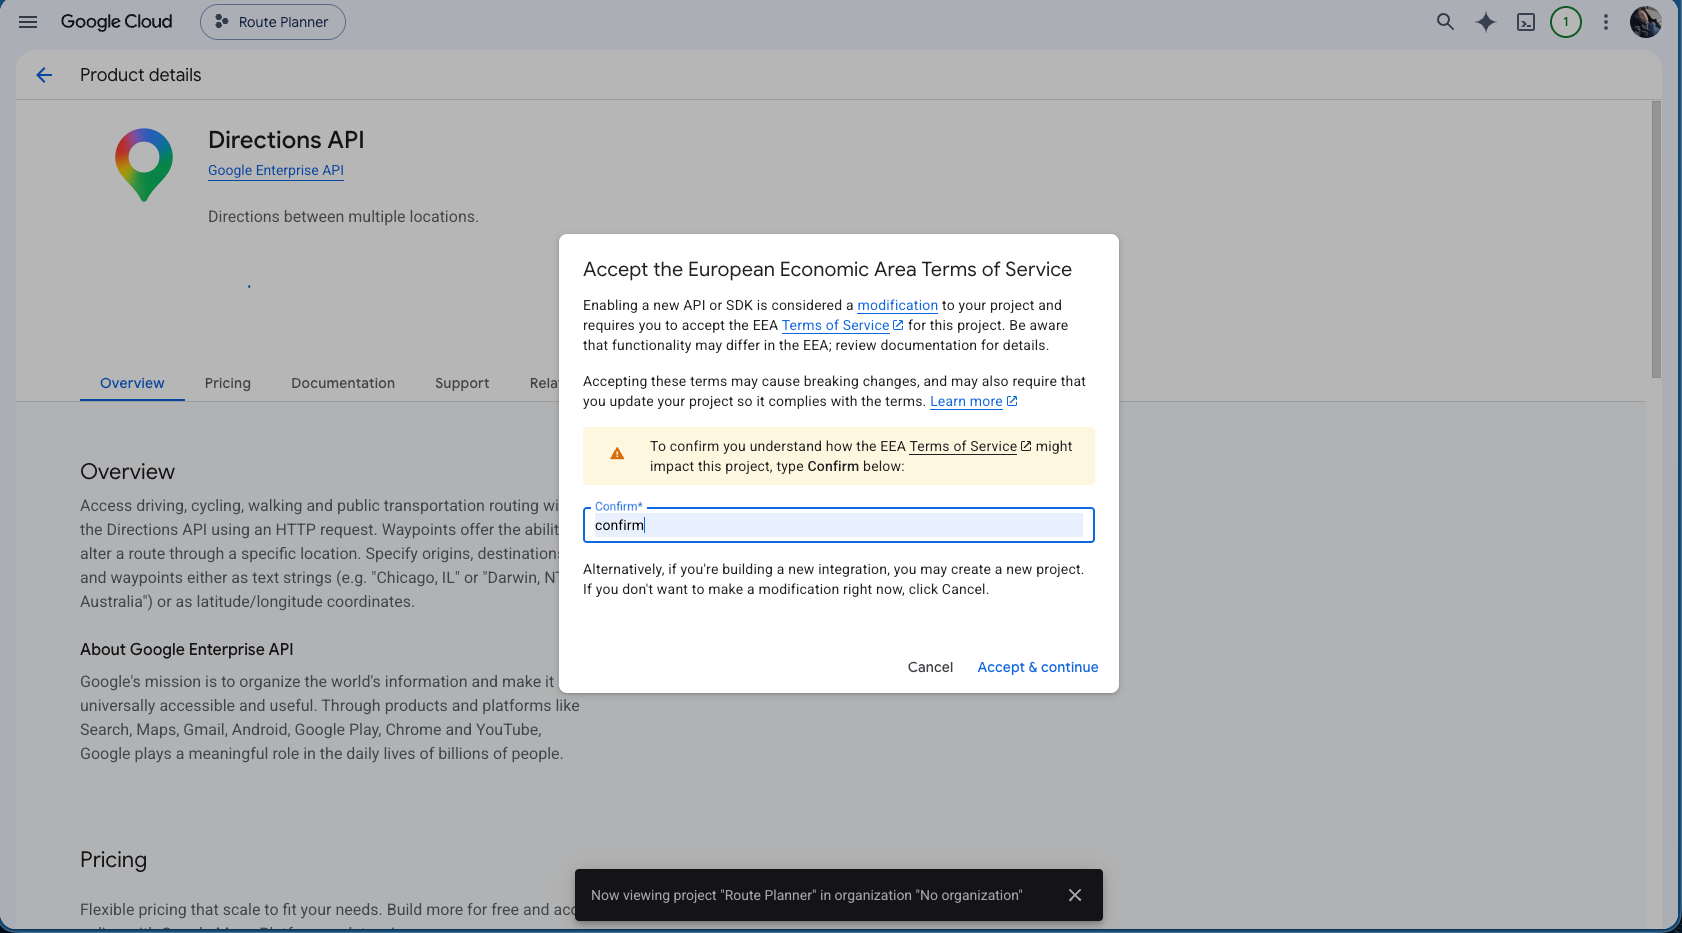
If Google shows an EEA dialog: type confirm and click Accept & continue.
Repeat the exact same process in API Library for:
Only the API name changes. The flow is otherwise identical.
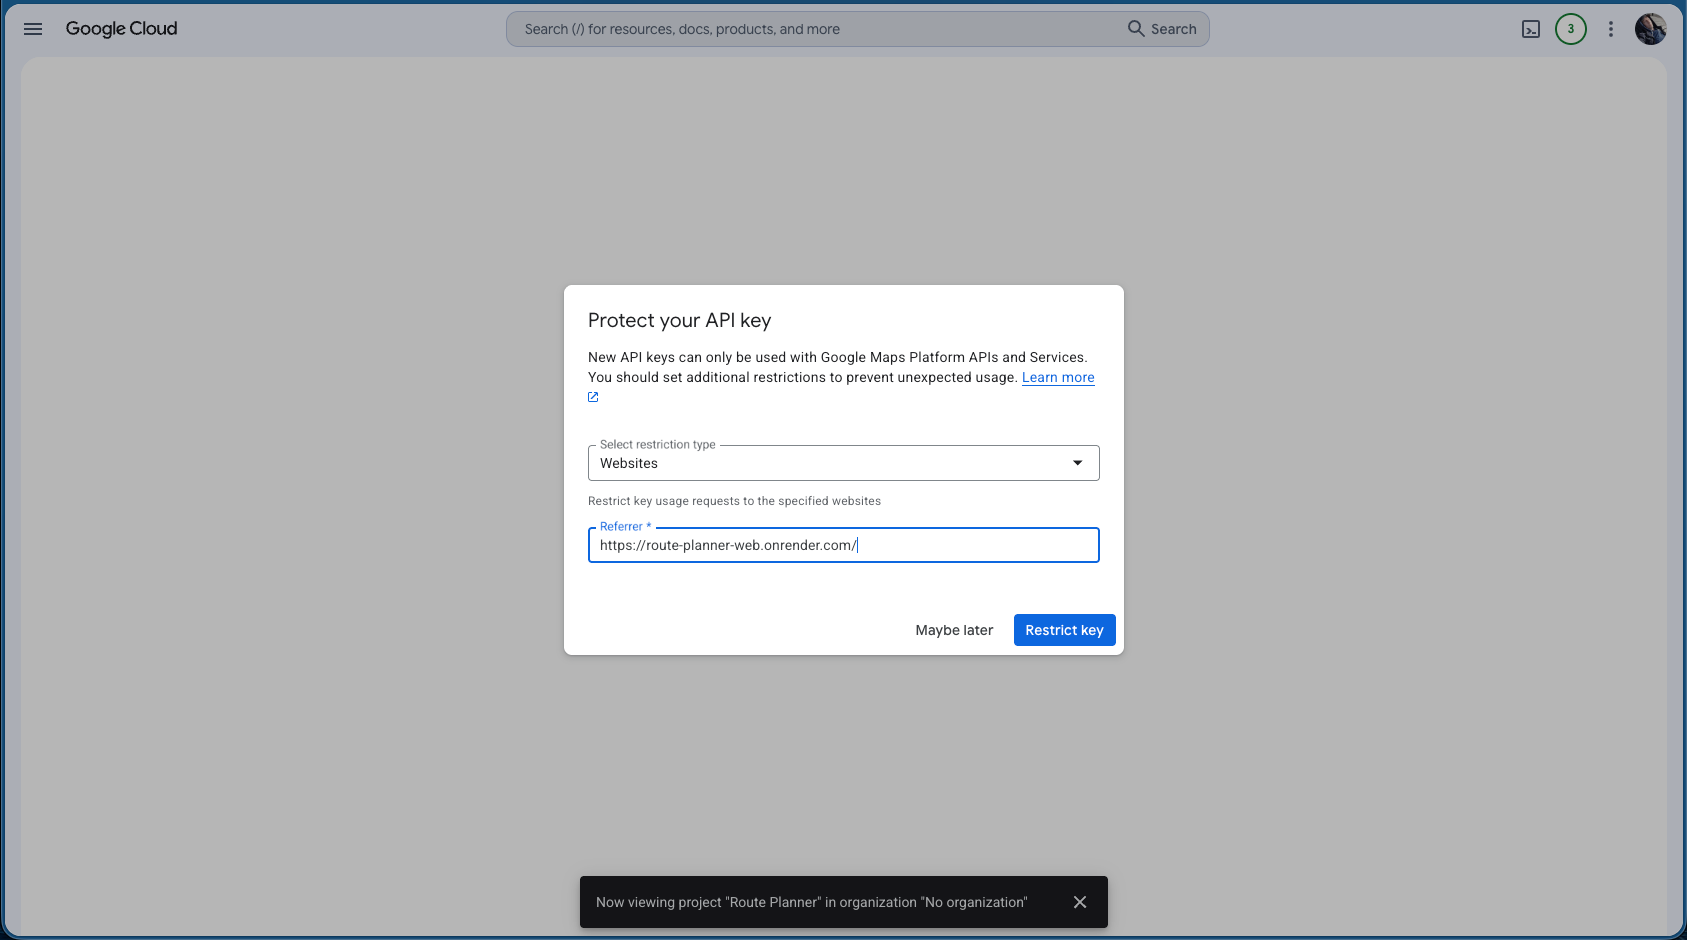
After the first API is enabled, Google may automatically create a Maps Platform API Key. Choose Websites as the restriction type.
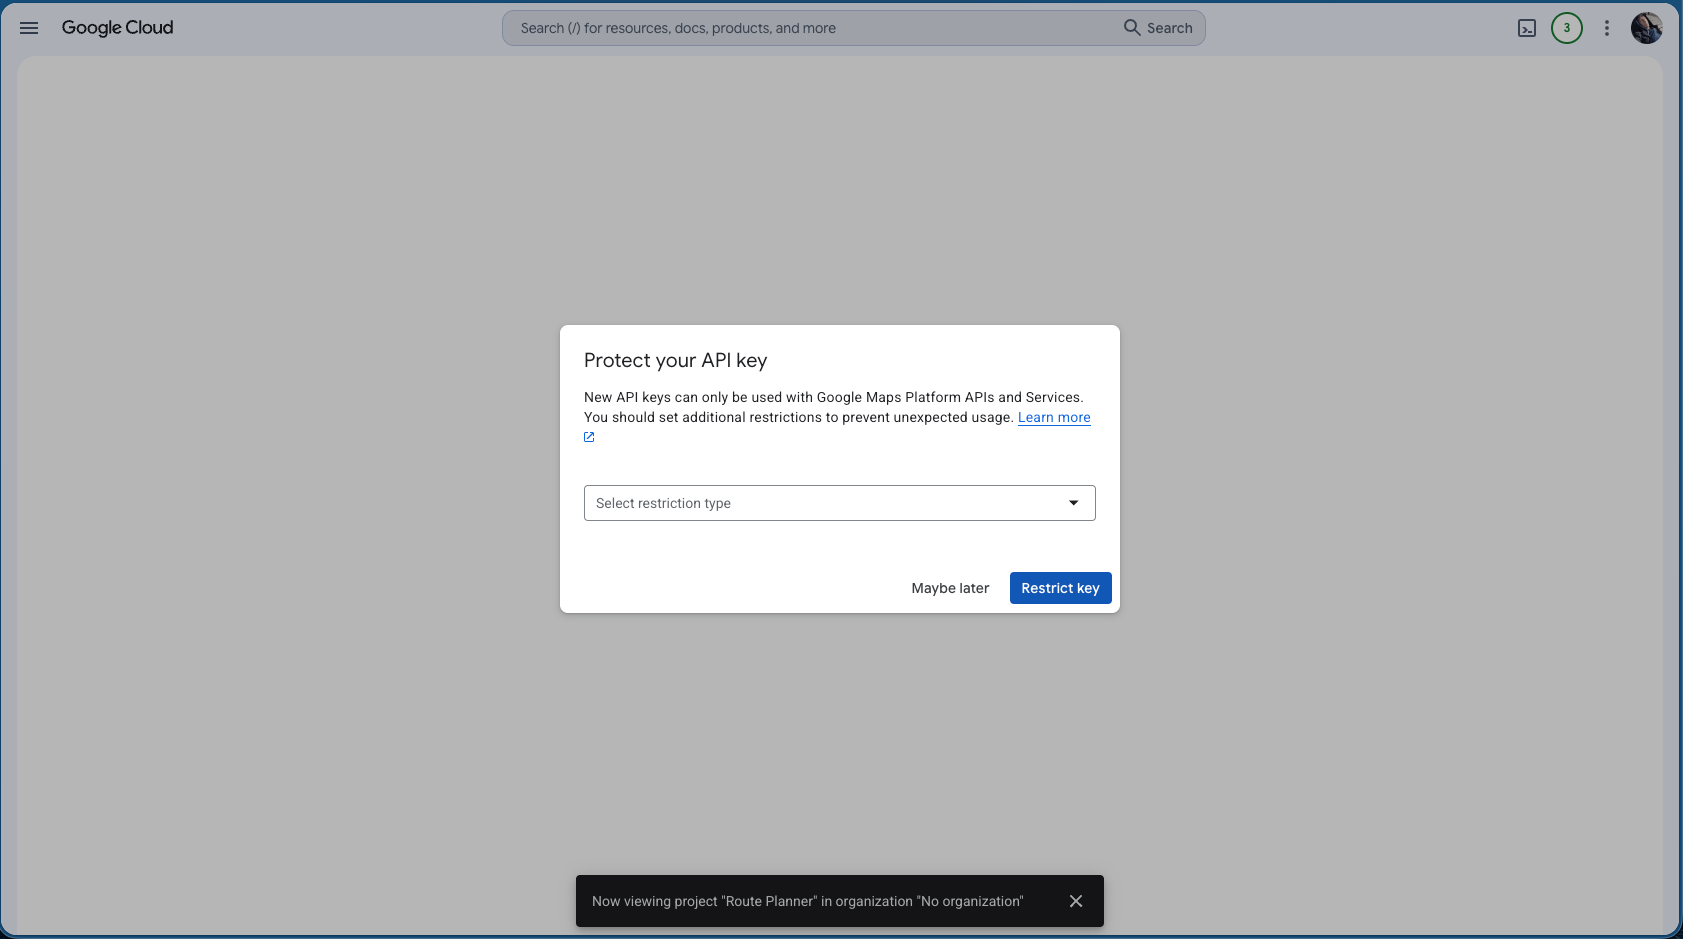
Enter Waybound Studio as the referrer:
https://wayboundstudio.com/*Then click Restrict key.
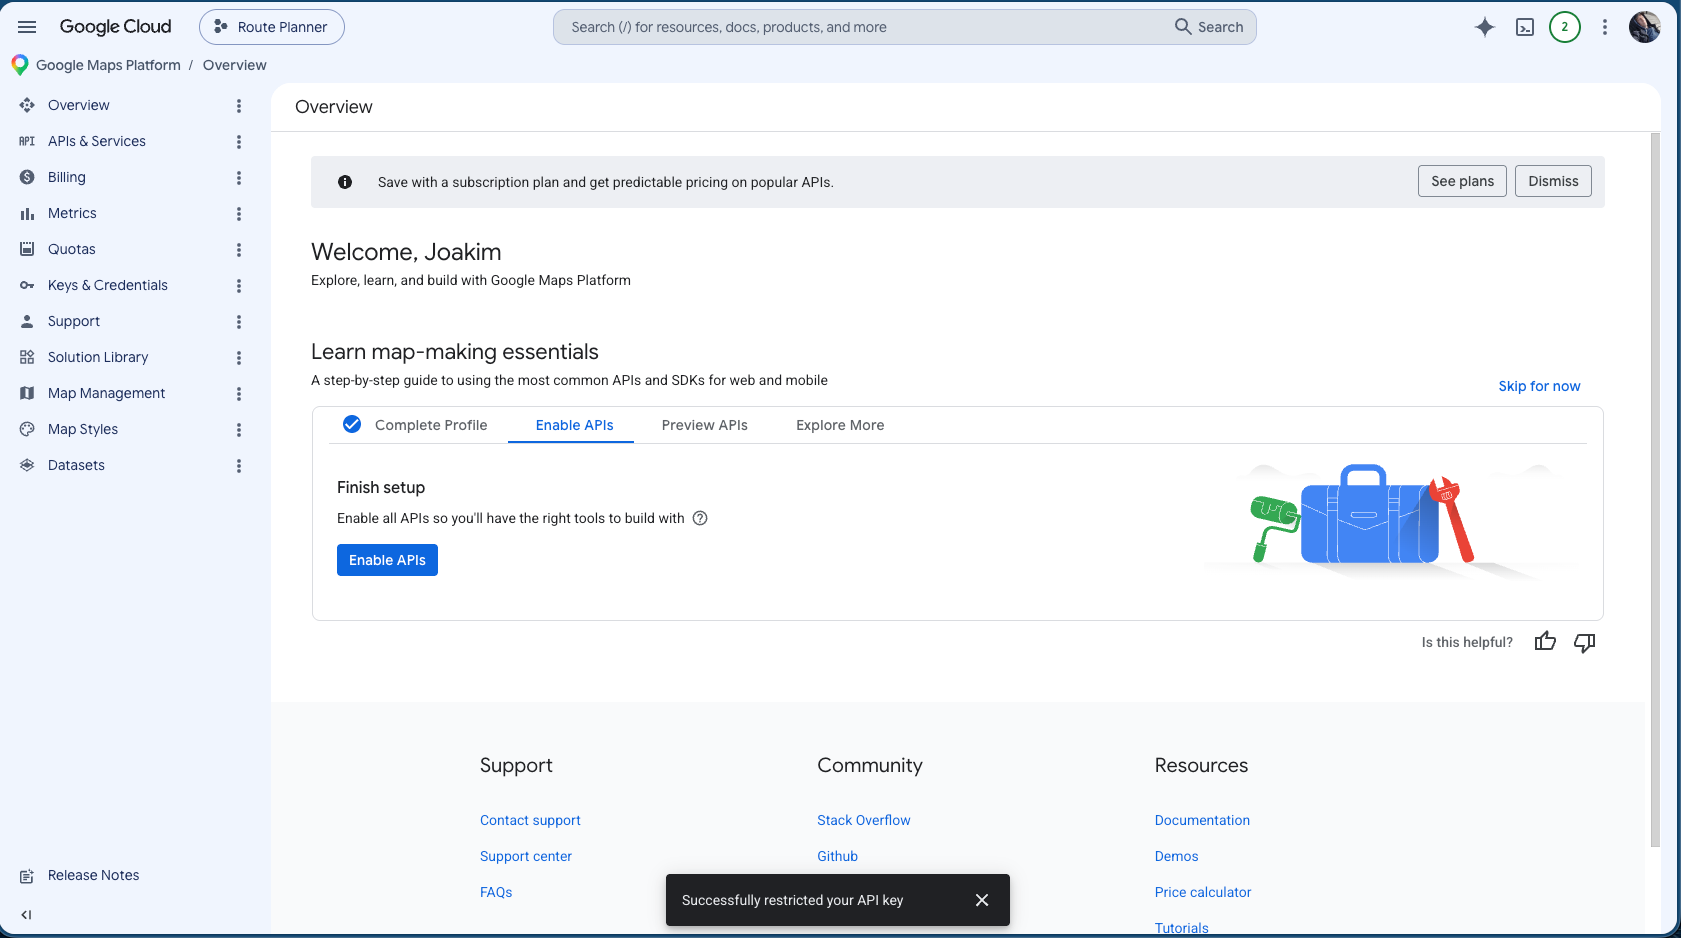
After saving the restriction, Google usually returns to Google Maps Platform Overview.
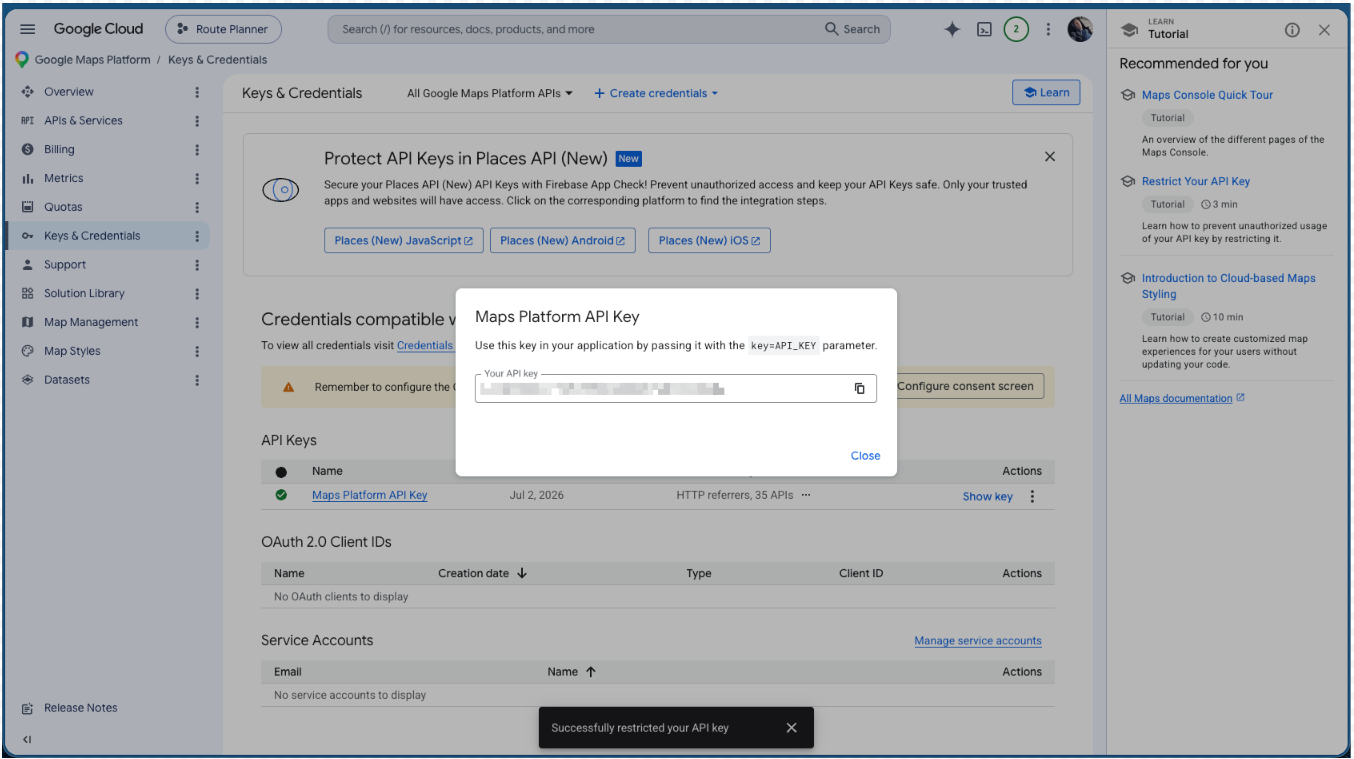
Go directly to Keys & Credentials. This page lists the API keys for the project.
Open Keys & Credentialshttps://console.cloud.google.com/google/maps-apis/credentials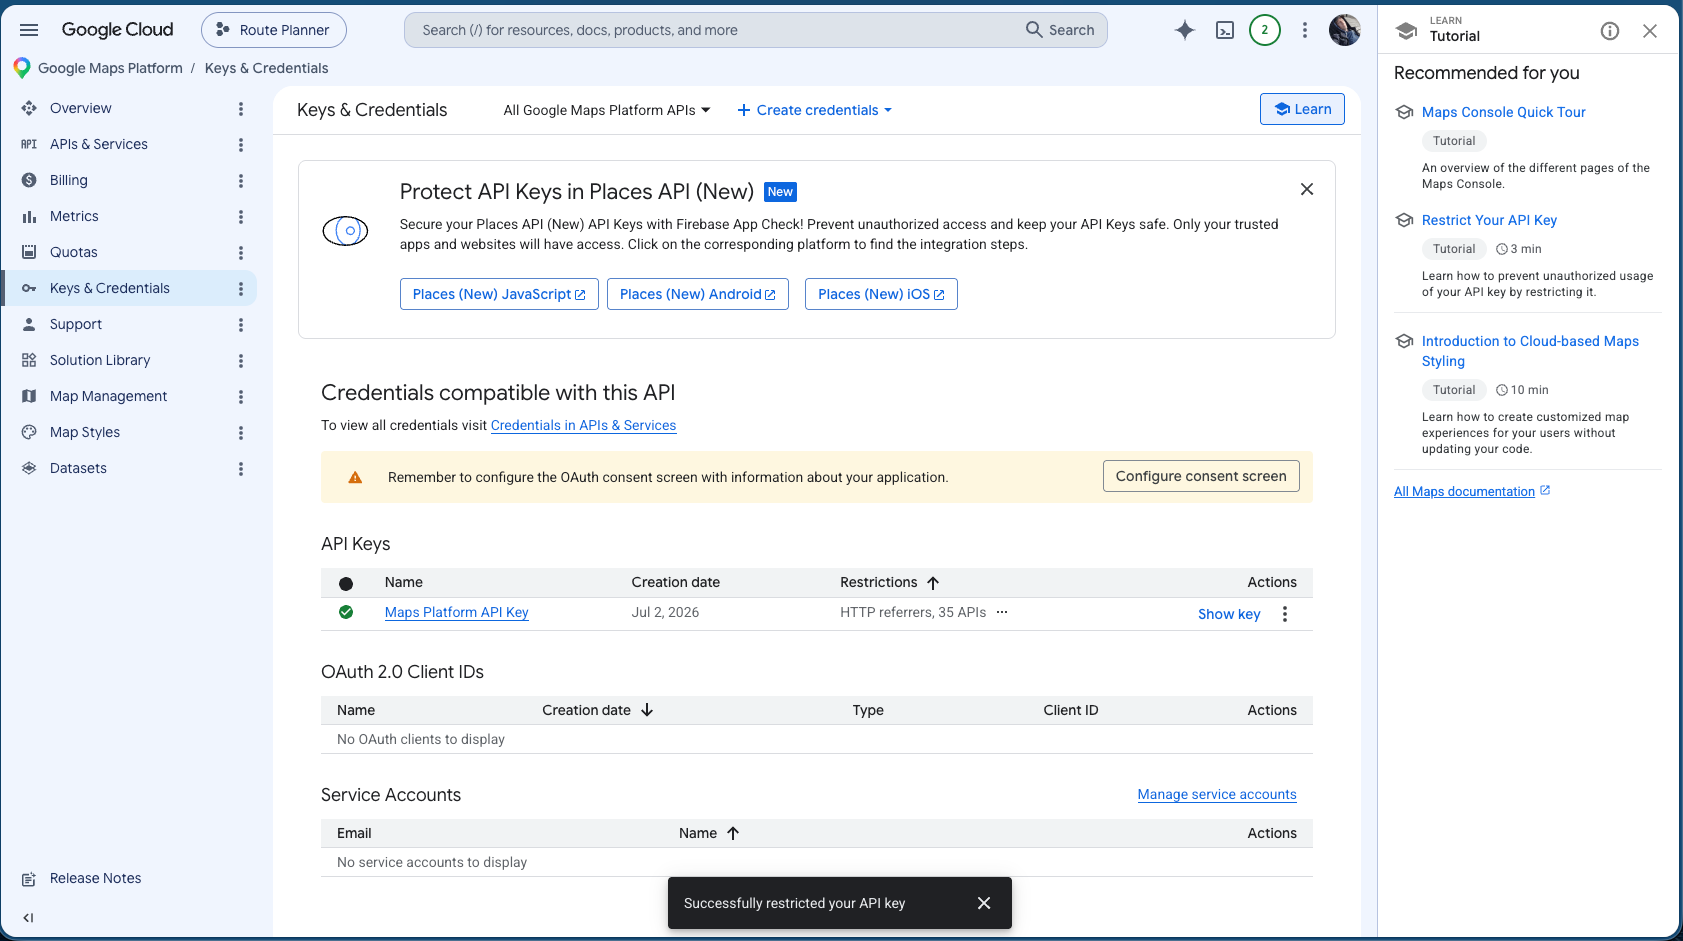
Click Show key and then the copy icon. Never publish the key in plain text.
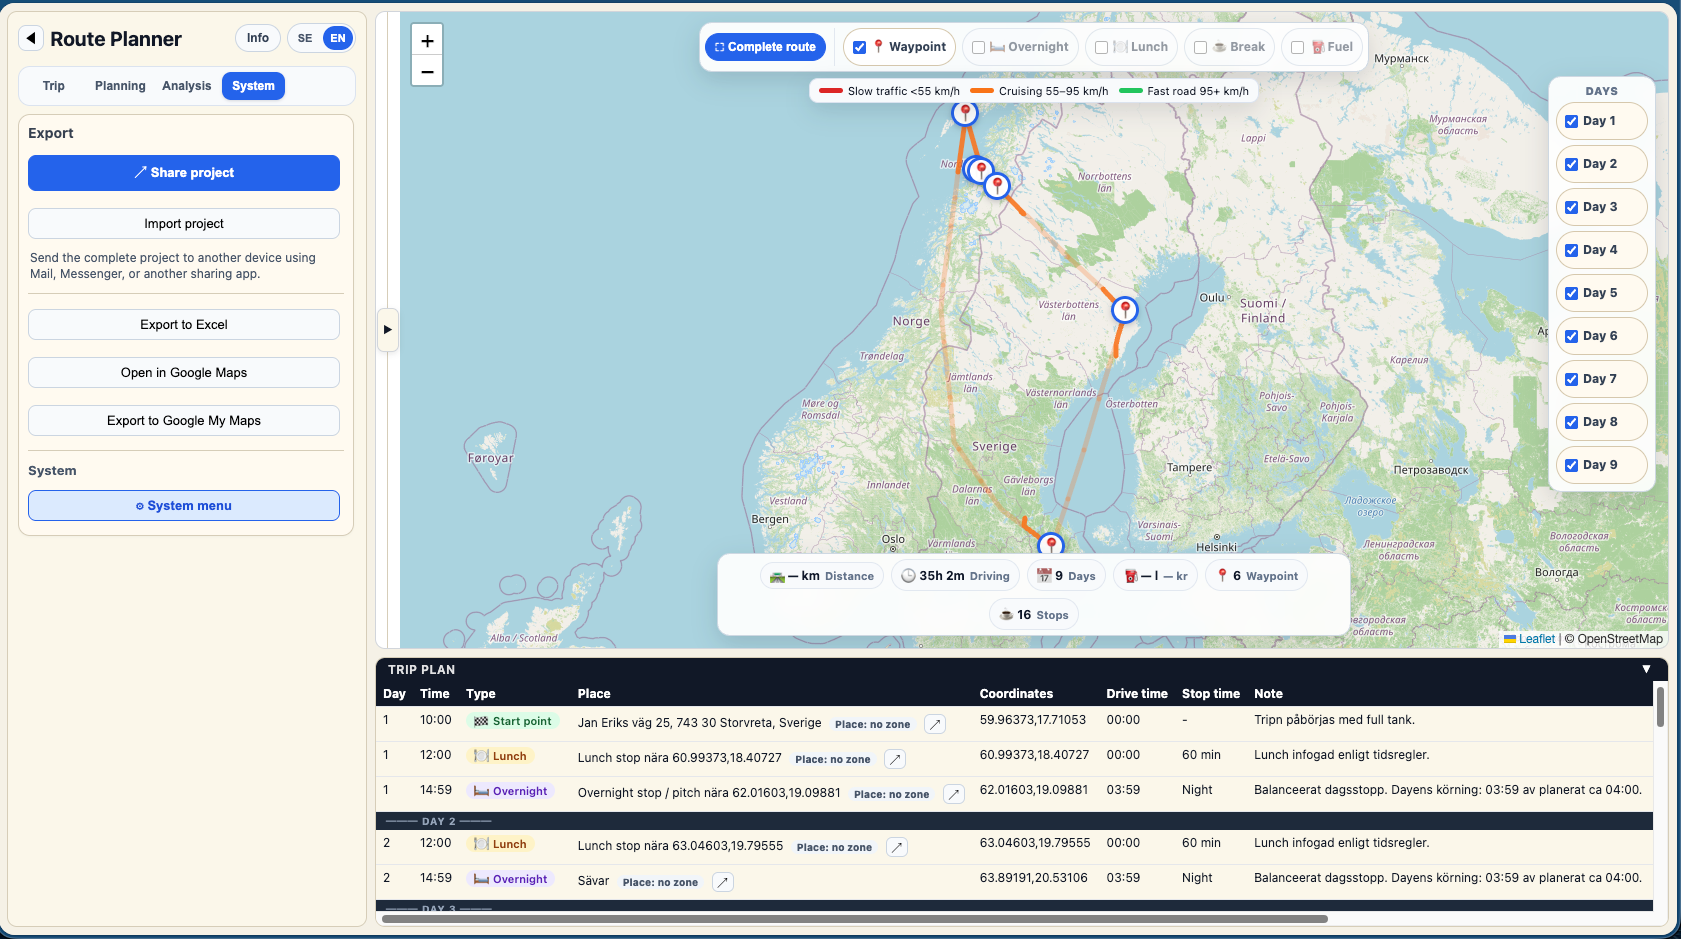
Open Waybound Studio and go to System. Then click System menu.
Paste the key into Google Maps API key and click Apply & save.
The key is stored only in your browser and is not sent to Waybound Studio servers.
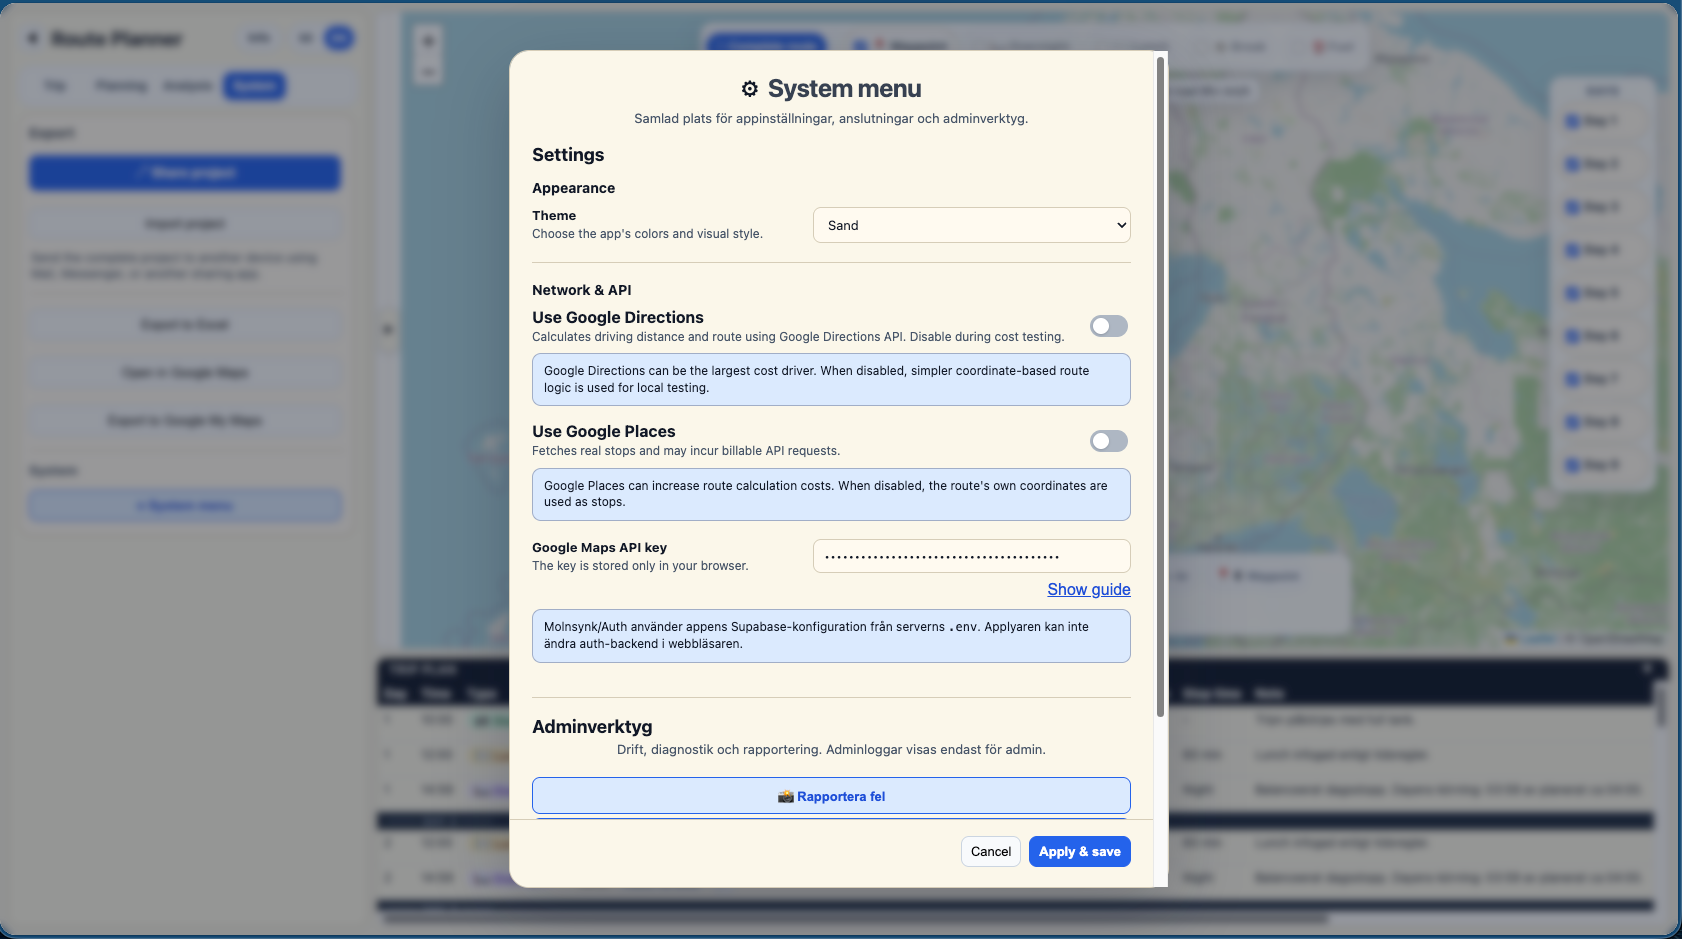
For best results, keep Use Google Directions and Use Google Places enabled.
The switches can be turned off temporarily if you plan many trips and want to reduce Google API calls.
Google Cloud Billing Reports shows usage and costs over time. Use this page to monitor monthly cost, cost per API, and cost trends.
Open Billing Reportshttps://console.cloud.google.com/billing/reports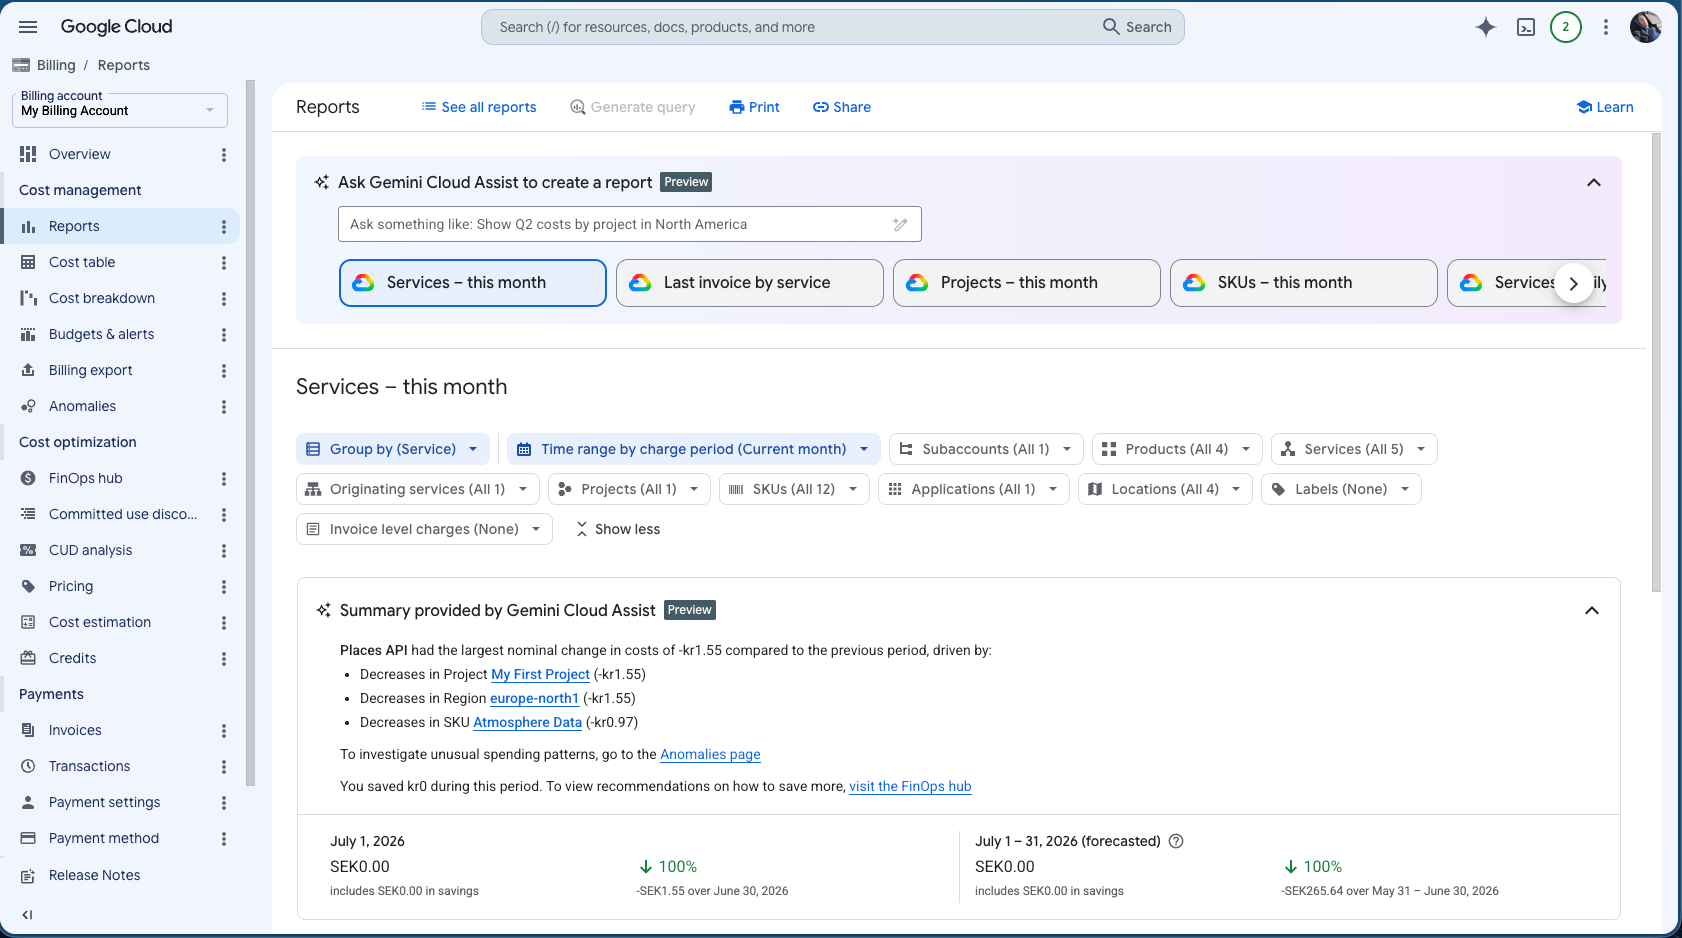
Installation complete
You can now calculate routes, search real places, monitor Google costs, and continue planning your first trip.